UE5 Tutorial: Battery powered flashlight, no tick only timeline | also includes pickups via interface
Unreal Engine 5 - First steps with "Lumen"
my lumen attempt.
a guitar from the inside. made this scene some years ago and never finished it. only a directional light was used here. didn't get the warm up to work so exposure comes late #ue5 #lumen #unrealengine
Learning Blender..
ye...finally i get some routine and some proper modeling time in blender.
see my first model!
it's based on the awesome tutorial by MAR
https://www.youtube.com/watch?v=rEBwBrRzyhw
Doubled geometry fix with Unreal Engine Ray Tracing and World Position Offset (weird shadow bug)
Not really something new and you can find the fix elsewhere on the internet too,
but since i tend to forget this handy little property, i'll archive this here too:
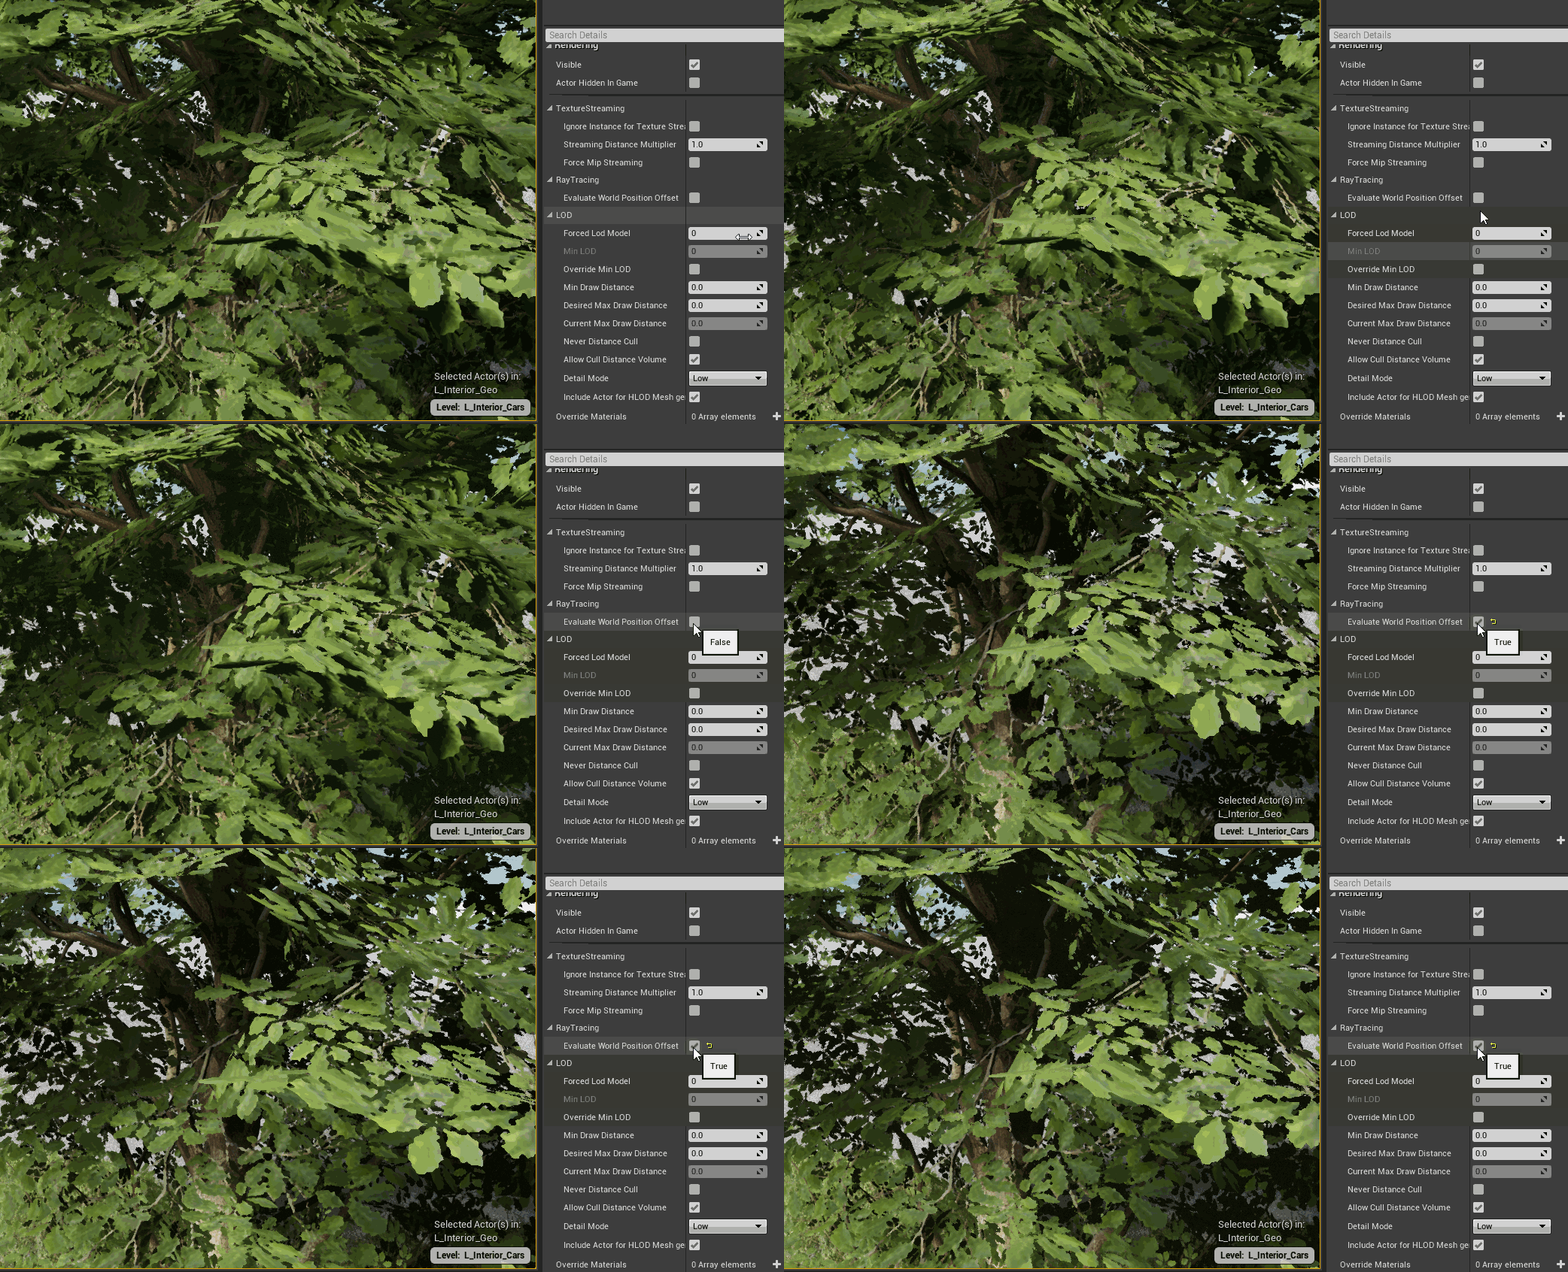
problem: when using ray tracing and also having WPO in use e.g. in your vegetation shader, your polygons will be displayed twice.
to fix this, click on your actor, open the advanced rollout for rendering and turn on:
- evaluate world position offset
this will remove the static rendered geometry from your object and also remove the weird shadows that come with it.
however there is currently (UE v4.26.1) no fix for this when using instanced meshes. so you can only disable any WPO effects from your grasses when you placed these as instanced geometry from the foliage tool.
i will update this post once i found a solution
[EDIT]
So yea there is a weird workaround. will shared it in one of his videos here:
basically ou would make a blueprint turn that tick on, make an actor foliage actor and then paint the thing
Virtual landscape texture blends with objects
Creating a basic mission marker in Unreal Engine 4
Learn how to create a simple mission marker in Unreal Engine 4 Features of it are:
- renders above all other objects
- stays the same screensize regardless how far the player is away
Please consider supporting me here https://www.patreon.com/saschahenrichs
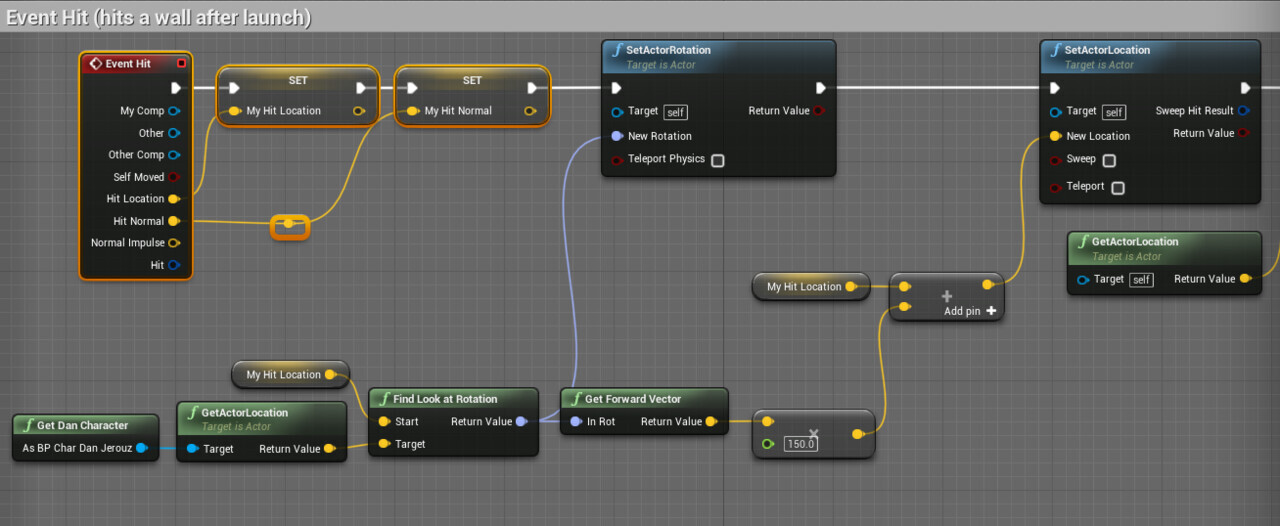
Place object XX cm infront of hit location
Wiring up Anisotropy in an Unreal Engine Shader
[EDIT]
I did it wrong in my post. You should apply some simple math on the flowmap for it to work correctly.
Find this enlightening post from UNREAL GEMS to get the correct way on how to utilize flowmaps for anisotropy
[edit] The below approach is not completely correct. Follow the above Tutorial to get it right!
This is obviously for the case you do not want to map your object. so a triplanar mapping.
Ofc this is also possible with normal UV's
you can find an anisotropy map here:
https://www.textures.com/download/pbr0028/133064
Recalculate polygon normals in the shader in Unreal Engine
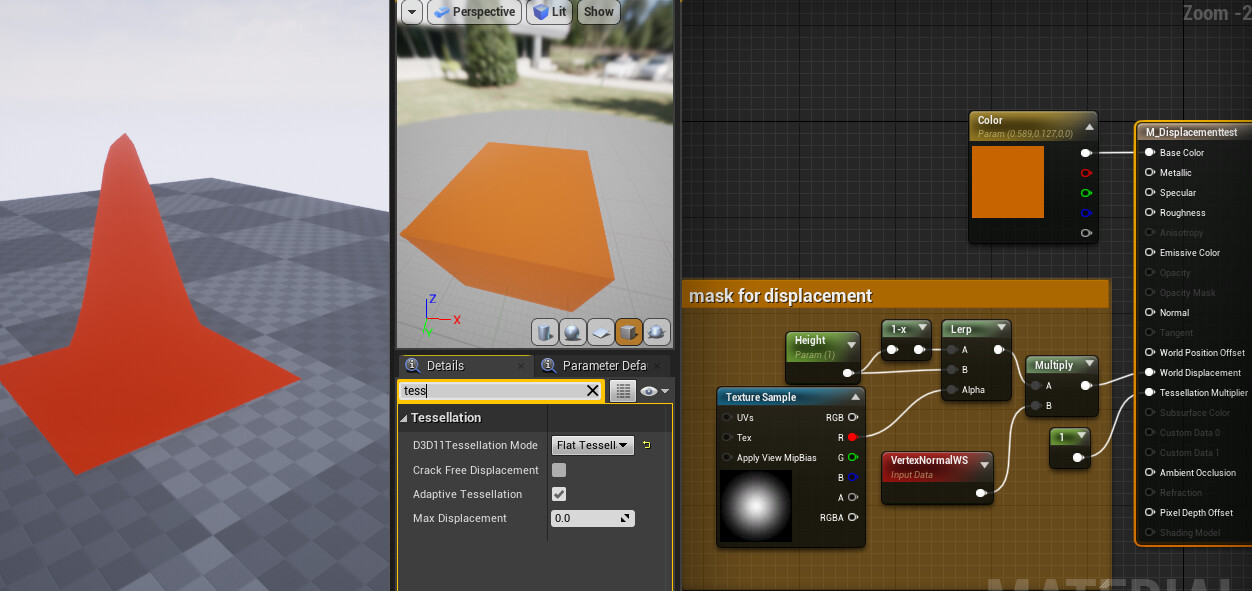
if you ever find yourself in a situation where you need to recalculate normals after displacing your mesh within the vertex shader. e.g. in conjunction with tesselation, there is a way to do this with the "normal from height" node
(I deactivated shadows on this object to show the effect more clearly)
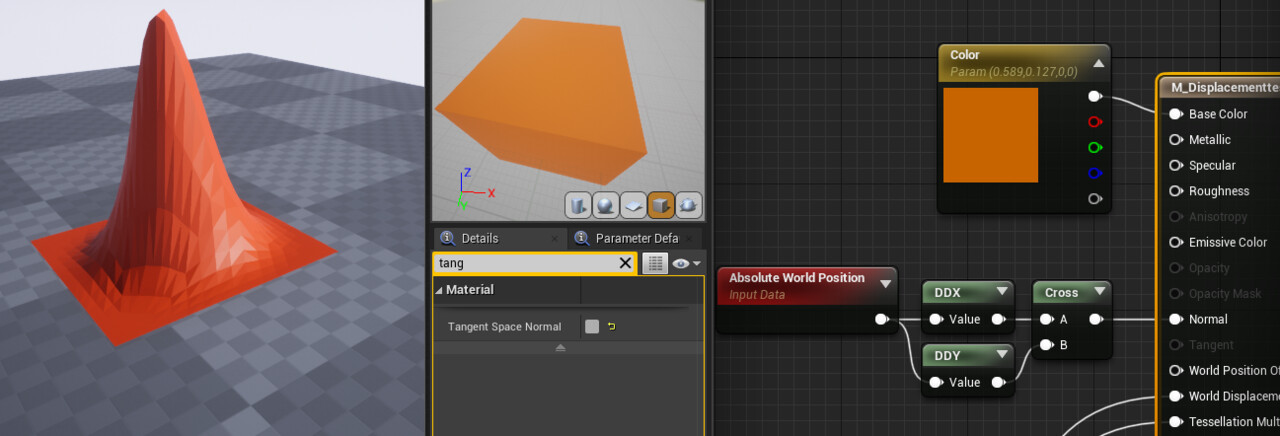
it can be solved like this
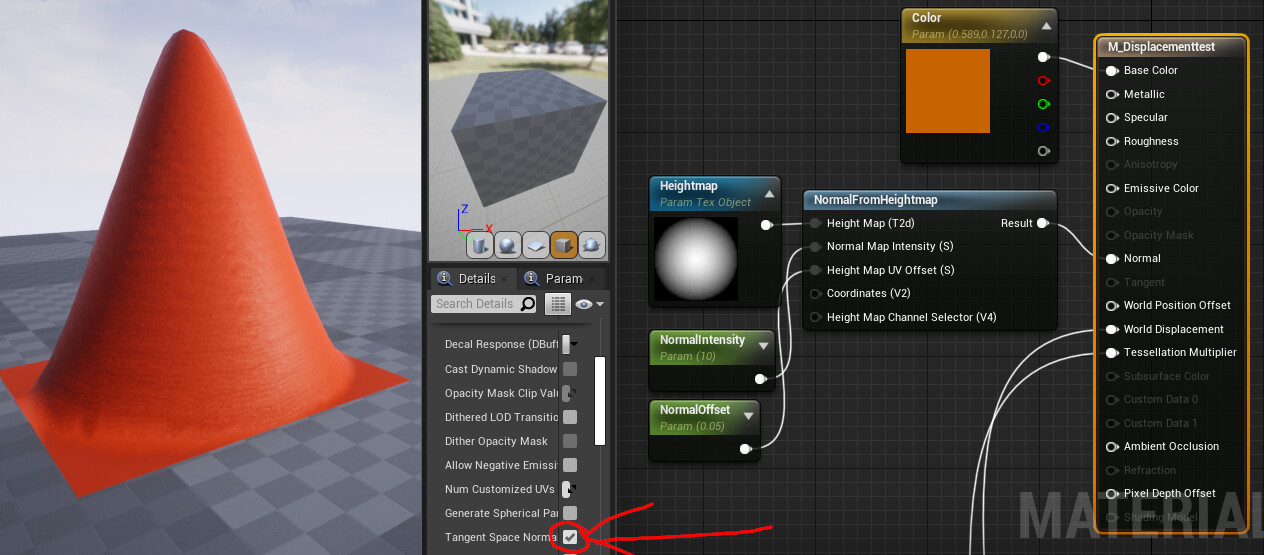
note that you turn off tangent space normals in the main shader properties.
However the normals are then facetted
in order to get smoothed normals, you can use the "NormalFromHeight" node
the lower the normal offset, the higher you need to set the normal intensity.
